Network Configuration
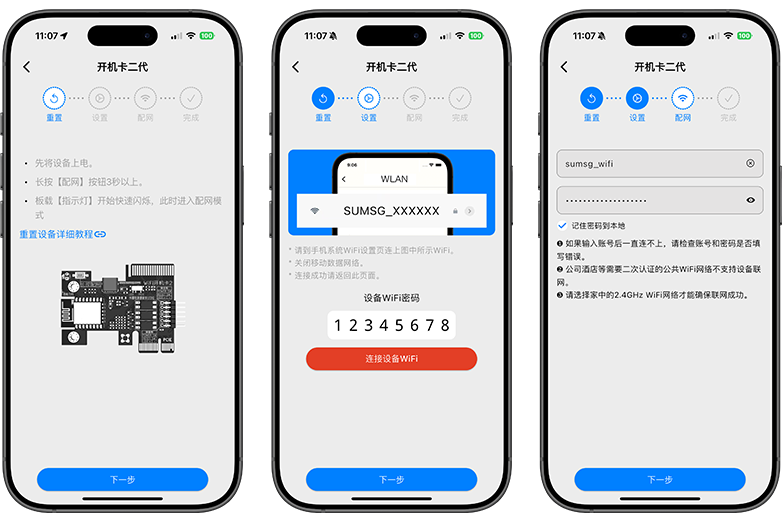
Device network configuration is the most crucial step. Only after successful network configuration and binding can the device be controlled remotely. Network Configuration v1
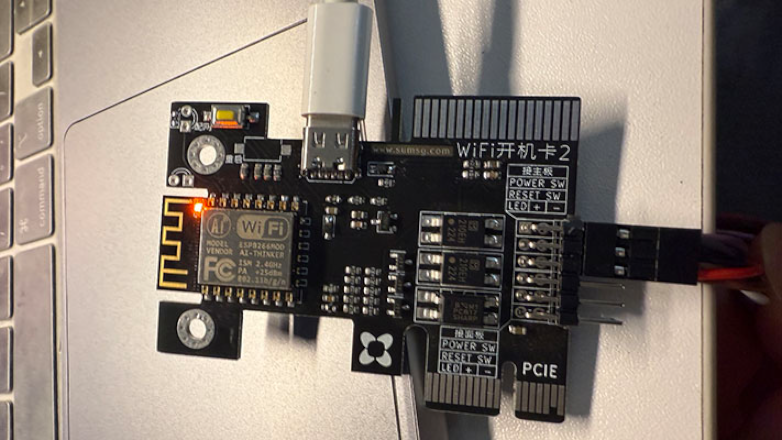
Power On
Connect the device to a Type-C power source or install it on a PCI-E slot to power it on. After a moment, the indicator light will blink rapidly.
Network Configuration Mode
When the indicator light blinks rapidly, the device enters network configuration mode. If it is not in this state, press and hold the configuration button until the indicator light blinks rapidly.
Setting Up WiFi
- In your phone settings, turn off mobile data and keep only the WiFi connection.
- Open the downloaded Smart Home app. On the homepage, tap the + in the upper-right corner and select "Boot Card Gen 2."
- Follow the app instructions to complete the network configuration.
Warning
- Only supports 2.4G WiFi networks.
- Does not support networks requiring web authentication, such as hotels or airports.
- For networks with combined 2.4G and 5G signals, if the device does not work properly, try separating them.
Button Functions
Each press toggles the onboard light on or off.
| Button Operation | Function |
|---|---|
| Press and hold | Enters network configuration mode; onboard light blinks rapidly |
| Press twice | Restarts the device |
| Press four times | Enters HomeKit pairing mode (requires prior app network configuration) |
| Press six times | Removes HomeKit pairing |
| Press eight times | Enters local OTA mode |
Caution
Updating third-party firmware may damage the device.
Updating third-party firmware voids the warranty.
Copyright
License under:Attribution 4.0 International (CC-BY-4.0)